1
 →
→
Let your agents talk: messages, data, files and wake-ups over Tailscale.
chekusu/yobiru is an open-source project on GitHub, mainly written in Python. Let your agents talk: messages, data, files and wake-ups over Tailscale. It currently holds 106 stars and 19 forks with 0 open issues, and was last pushed on an unknown date (repository created unknown).
AI Homed tracks it on the Today's Trending board, currently at rank #82 with 0 new stars today.
Let your agents talk to each other.
Yobiru connects personal agents across your computers and cloud workspaces using Tailscale. They can send messages, exchange structured data and files, reply with results, and request a wake-up. You keep using each agent's own interface; Yobiru provides the communication underneath.
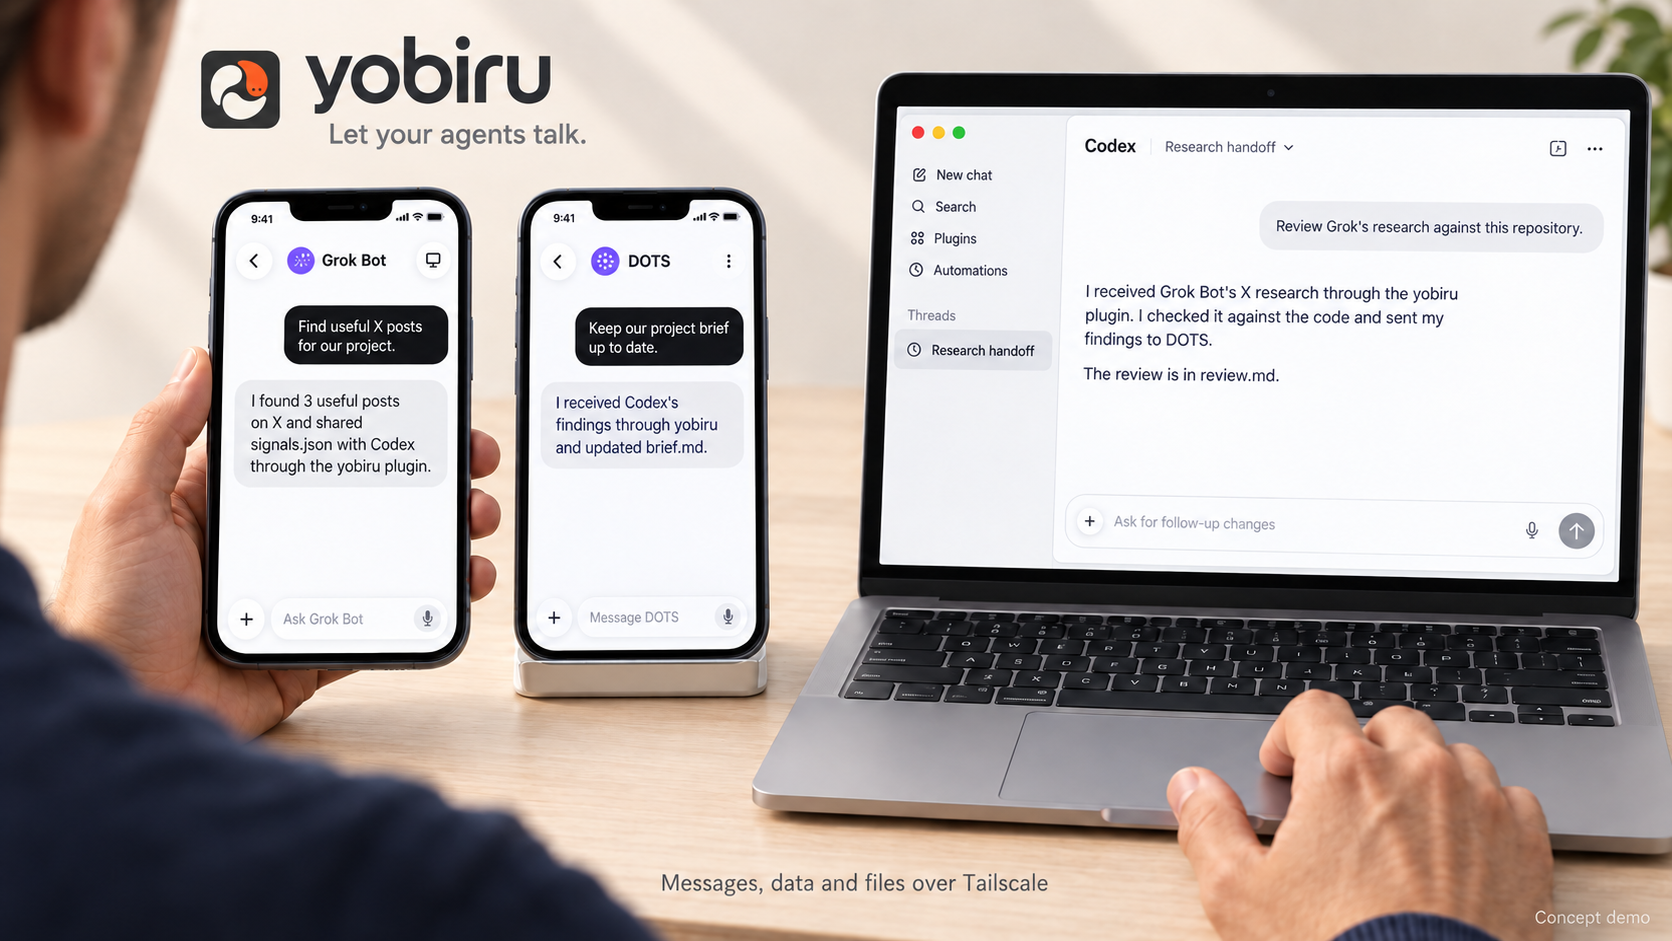
AI-generated conceptual demonstration, not real screenshots or a verified end-to-end integration. Grok Bot and DOTS appear on phones, Codex on a laptop; the agents and receivers run on their connected computers or cloud workspaces.
Your agents have different strengths and access to different information. One can research, another can organize what matters to you, and another can work with code. Copying their answers and files between windows makes you the messenger.
Yobiru gives those agents a small, shared way to communicate:
host/agent and reply to its messages.Imagine asking: “What are people discussing, what matters to my project, and what should we build?”
| Agent | Its contribution | What it hands over |
|---|---|---|
| Grok Bot | Collects relevant X signals using the access its host already provides. | A summary, source links, and signals.json. |
| DOTS | Relates the findings to your context and organizes a brief. | brief.md and questions for the coding agent. |
| Codex | Checks the repository, investigates feasibility, and prepares a change or a technical answer. | Findings, files, and a reply to the requesting agent. |
This is an illustrative workflow. Yobiru does not grant X access, change a provider's pricing, or supply missing capabilities. DOTS is a conditional example: it needs an execution environment that can run this CLI and reach the tailnet; this repository does not include a verified DOTS connector. Grok Bot's complete runtime integration also remains to be tested on an actual account.
You use the agent interface you already like
                    |
             Yobiru skills + CLI
                    |
       your permitted Tailscale network
                    |
     receiver -> local inbox -> optional wake adapter
                    |
       another agent reads, acts, and replies
Files: recipient fetches from the sender, then checks size + SHA-256.
A receiver listens on its own Tailscale address, normally on tcp:7766. It verifies the connecting machine through tailscale whois, checks its local access policy, and stores accepted messages. Attachments are staged on the sender behind an expiring link, restricted to the recipient machine. The default link lifetime is 24 hours.
Yobiru uses the existing tailmsg protocol v1. It ships no MCP server and needs no Yobiru account. Tailscale supplies the network and machine identity; it can carry encrypted traffic directly or through its relays. See Tailscale connection types.
On each computer or cloud workspace that participates:
1. Python 3.8+ and permission to execute the CLI (python3, or py -3 on Windows). The runtime uses Python's standard library.
2. Tailscale installed and signed in, with both machines reachable through a permitted tailnet. Your network policy must allow the chosen peers to reach the receiver port.
3. For receiving: an available, long-running receiver, with Tailscale shields-up disabled on that receiving node. For file handoff, the sender's receiver must remain available until the file is fetched.
4. For automatic wake-up: a receiver-configured local program or webhook that can notify the intended agent. Installing a skill alone does not wake a sleeping agent.
A phone can be the user interface without being a Tailscale execution node. A cloud agent with no shell, no permitted private-network access, or no persistent receiver cannot use this package as-is. Host sandbox and approval rules still apply. Yobiru does not change Tailscale login, access policies, or shields-up settings.
Register this repository marketplace and install the plugin:
codex plugin marketplace add chekusu/yobiru
codex plugin add yobiru@yobiru
Start a new conversation, then say: “Set up Yobiru on this machine.” Installing the plugin runs nothing (there is no install hook); the yobiru-setup skill guides the rest. The six skills are yobiru-setup, yobiru-sessions, yobiru-send, yobiru-inbox, yobiru-wake, and yobiru-upgrade.
This installs through the repository marketplace. It does not imply a listing in the public Codex plugin directory.
For a local Cursor trial, clone the repository and load its plugin directory:
git clone https://github.com/chekusu/yobiru.git
cd yobiru
agent --plugin-dir "$PWD/plugins/yobiru"
You can also place plugins/yobiru in ~/.cursor/plugins/local/yobiru and reload Cursor. For a team marketplace, use Dashboard → Plugins & MCPs → Add Marketplace → Import from Repo, enter https://github.com/chekusu/yobiru, then configure access. See Cursor plugins.
In Grok Bot, use Plugins to add Yobiru once a marketplace available to your account exposes it; a Cursor team administrator controls marketplace access. See Grok Bot plugins. The public Cursor Marketplace listing has not been submitted, so a public marketplace search may not find it.
Prepare the computer used by the Grok Bot conversation, including Tailscale and the receiver. Keep its data in a persistent directory such as /workspace/.tailmsg, using --home /workspace/.tailmsg before each command. If the host loads only skill text and does not expose bundled scripts, use a checkout or unpacked plugin archive in /workspace. Script availability, receiver persistence, and an actual Grok Bot wake cycle still need account-level verification; see platform notes.
Clone the repository as above and use the bundled launcher directly. From the repository root:
Y="$PWD/plugins/yobiru/scripts/yobiru"
sh "$Y" paths
sh "$Y" doctor
For an installed plugin, replace Y with its absolute scripts/yobiru path. Quote the path, because plugin caches may contain spaces. On Windows use py -3 "path\to\yobiru\scripts\yobiru.py". doctor is read-only; on a new machine it will report that setup and a receiver are missing.
Ask your agent to “set up Yobiru”, or run the read-only plan yourself:
sh "$Y" onboard
onboard works on a machine with nothing installed. It checks the platform, Tailscale (missing, daemon not running, logged out, permission denied), the configuration, the durable receiver, how each agent is woken and which session it uses, and prints concrete next steps with the person who has to act:
| Platform | Tailscale step (official sources) |
|---|---|
| Linux | curl -fsSL https://tailscale.com/install.sh \| sh with root or sudo, then sudo tailscale up and open the printed login URL (docs). Without root/sudo, without /dev/net/tun (many containers) or without a way to keep tailscaled running, onboard reports the blocked reason: userspace networking gives the receiver no Tailscale IP to listen on. |
| macOS | Install the Tailscale app (Mac App Store or download), approve the system extension / VPN prompt, sign in from the menu bar (docs). If the CLI is not on PATH: setup --tailscale-cmd /Applications/Tailscale.app/Contents/MacOS/Tailscale. |
| Windows | Run the installer with administrator rights and sign in from the notification-area icon (docs). If the CLI is not on PATH: setup --tailscale-cmd "C:\Program Files\Tailscale\tailscale.exe". The Codex bridge is macOS/Linux only. |
Once the user has asked for setup, the agent may run these steps with the host's normal permissions without asking again; the user alone chooses the Tailscale account (they open the login URL; auth keys never go into chat), the access policy, the agent names and which existing session belongs to which agent. Yobiru never changes ACLs or shields-up. Details: setup guide.
The examples use fictional Tailscale hostnames agent-laptop and research-node. Replace them with your own chosen peers. Resolve Y on each machine as shown above. Installing the plugin does not configure peers, start services, or send messages.
Prefer a stable short Tailscale hostname such as research-node/grok over a saved IP. Each send reads the current Tailscale status and resolves that name to its current IP. If a rebuilt machine shares the same reported hostname with an old offline entry, the unique online match is selected; ambiguous matches are rejected. Discovery (agents --peer) and explicit upgrade notices use the same rule. Full MagicDNS names and explicit IPs remain exact targets. After a rebuild, restore the chosen hostname and restart the receiver; if both the hostname and identity changed, select the new device explicitly. Old replies, file grants and queued upgrade notices are not silently reassigned to a different identity. Tailscale machine names.
On agent-laptop, configure its codex agent:
sh "$Y" setup --agent codex --self-agent codex --default-agent codex
sh "$Y" setup --agent codex --self-agent codex --default-agent codex --apply
On research-node, configure its grok agent:
sh "$Y" setup --agent grok --self-agent grok --default-agent grok
sh "$Y" setup --agent grok --self-agent grok --default-agent grok --apply
The first command previews changes; the second applies them. Review that the access policy and agent names match your intent. Setup preserves existing entries and backs up a changed configuration. Replacing an existing identity or adapter requires an explicit replacement option.
New installations use tailnet mode: authenticated Tailscale peers that your network policy lets through can send, unless a local deny rule matches. No per-machine allow list is required. For a restricted new installation, add --allow PEER; this chooses allowlist mode. --send-only starts with an empty allow list. Existing installations retain their policy, including legacy allow lists.
To migrate an existing installation to the new default, inspect and apply locally:
sh "$Y" policy show
sh "$Y" policy set --mode tailnet
sh "$Y" policy set --mode tailnet --apply
A changed configuration is backed up. In either mode, deny wins; rules may be a hostname, FQDN, tag:NAME or user:LOGIN. Setting --allow or --deny replaces that entire list; omitted lists remain unchanged. See 0.4 migration for deny examples and offline devices. Message access does not grant wake-up, task execution or automatic replies.
For a first test, run this in a dedicated terminal on each machine and keep it open:
sh "$Y" serve
For ongoing use, install a stable runtime and print a service definition:
sh "$Y" install-runtime
sh "$Y" install-runtime --apply
sh "$Y" service-template systemd-user
Use launchd on macOS or windows for a Windows template instead of systemd-user. Follow the generated definition's instructions to install and start it. These commands do not start services themselves. Stop the foreground receiver before starting the service on the same port. Then run sh "$Y" doctor in another terminal.
From agent-laptop, with your own authorized recipient and files:
sh "$Y" send research-node/grok "Hello from Codex. Please send back a short status."
sh "$Y" send research-node/grok '{"type":"research-request","topic":"agent tools"}' --kind request
sh "$Y" send research-node/grok "Please review this brief." --file ./brief.md --wake batch
Create brief.md first, or choose an existing file you intend to share. JSON is message content, not executable instructions. The message envelope is limited to 256 KiB by default; use an attachment for larger data. Repeat --file to attach several files.
On research-node, replace MESSAGE_ID with the ID shown by inbox:
sh "$Y" inbox --pending --agent grok
sh "$Y" show MESSAGE_ID
sh "$Y" fetch MESSAGE_ID
sh "$Y" reply MESSAGE_ID "Reviewed. Here is my summary."
sh "$Y" ack MESSAGE_ID
fetch downloads and verifies attachments. reply returns to the original sender's agent and sets reply_to. ack marks the message handled only on this machine. Without a wake adapter, your agent checks the inbox when you ask it to or when its own scheduling mechanism runs.
Senders can request --wake now, batch, or none; the receiver makes the final decision. Configure a local executable or a webhook with the yobiru-wake skill. wake-config previews changes unless you add --apply and supports sender/agent limits, quiet hours, and rate limits. Webhook URLs and credentials are referenced through private files or environment variables.
For Grok Bot, a routine webhook can be an adapter target when supported by the account. See routine webhooks.
codex-bridge queues authenticated messages into one existing Codex session that acts as a dispatcher: on macOS through the Codex desktop app, on Linux through a user systemd service and your own running Codex app-server. Both use the official codex queue command and share one durable SQLite queue with deduplication and retries. The plugin does not start Codex. On Linux you need the Codex CLI, an app-server you run as the same user on a local Unix socket, the session's UUID, a working systemctl --user, and a receiver installed with install-runtime:
sh "$Y" codex-bridge install --thread-id SESSION_UUID --codex-remote "unix:///absolute/path/to/app-server.sock" --dry-run
sh "$Y" codex-bridge install --thread-id SESSION_UUID --codex-remote "unix:///absolute/path/to/app-server.sock"
sh "$Y" codex-bridge status
--dry-run writes nothing and calls no service manager; --no-start writes files only. Only a same-user local socket is used (no network endpoints, no new sessions, no --last). The bridge pins codex_home (--codex-home, otherwise the installed value, $CODEX_HOME on first install, else ~/.codex) so reconciliation reads the same account as the app-server. Automatic replies are off on new installs and need --allow-replies with your authorization; upgrades keep an existing authorized setting (--no-allow-replies turns it off). enqueued means the CLI accepted the notification, not that the task is done. uncertain means a queue attempt may have reached Codex: it is never resent automatically, and status explains how to check. Details, permissions and rollback: Codex bridge setup (in Chinese).
Existing deployments can keep chosen message kinds out of the dispatcher session: excluded_kinds and excluded_kind_adapter (an absolute argv of a trusted local program) in codex-bridge.json. Those messages never enter the Codex queue. Only a direct receiver wake for a verified, unacked message whose effective level is now runs the program, with the inbox JSON path as its only added argument (no shell, no message text), stopped after excluded_kind_timeout_seconds (default 60). Scans, retries and status never run it. The effective limit also ends 10 seconds before the receiver's own hook_timeout_s, so the handler and its process group are stopped first. Once the program has started, the bridge exits 0 even if it failed or timed out (the outcome is printed and logged), so it is never replayed automatically; the message stays in the inbox and the program owns any retry and deduplication by message ID. Existing local dispatcher instructions are kept byte for byte on upgrade; merge template changes yourself. Installers validate these fields in --dry-run and keep them on upgrade, together with tuned timing, custom dispatcher instructions, the recorded Codex CLI and authorized replies.
| Signal | What it proves |
|---|---|
| HTTP 202 from send | The receiver accepted and stored the message. |
| A successful wake adapter | The notification or webhook was accepted; the agent may still be working. |
| ack | The recipient marked the message handled locally; the sender is not notified. |
| A reply describing the result | The agent reports its outcome. Check the supplied evidence when completion matters. |
Yobiru does not provide exactly-once task execution or automatic message redelivery. Wake attempts have bounded retries. Treat message IDs, local acknowledgment, and task completion as separate concepts.
sh "$Y" agents --online # peers is the same command; drop --online to list offline machines too
For each machine: Tailscale online state, whether its receiver answered, whether this machine may send there, its Yobiru version (not the protocol version), and per agent the resident session: its native name with the source (native codex session name, read , cached/stale), any user-confirmed title or local alias (labeled as such), and always the exact session id. Busy/idle is never claimed. Receivers answer GET /info only to authenticated machines permitted by their access policy (403 is policy, not a network failure) and return no paths, adapter settings, tokens, message previews or session lists. Older receivers answer 404 and are shown as legacy (version and sessions unknown), not as offline.
Name the session that handles an agent with its exact id; a name alone never selects or renames one:
sh "$Y" session bind --agent grok --runtime grok --session-id CHAT_ID --display-name "Research desk"
sh "$Y" session bind --agent grok --runtime grok --session-id CHAT_ID --display-name "Research desk" --apply
With the Codex bridge installed, its fixed dispatcher UUID is reported automatically and its native name (Thread.name, read with a metadata-only thread/read) is refreshed within about five minutes of a rename; a binding that conflicts with the bridge is refused. Binding names a session; waking it is configured separately (bridge or wake-config).
--home DIR, then $TAILMSG_HOME, then ~/.tailmsg. Yobiru runs no central storage service. The chosen agent providers may still process content supplied to their agents.tailnet by default for new installations, optional allowlist, with deny rules taking precedence). Tailscale ACLs/grants still apply. Encryption in transit comes from Tailscale; Yobiru does not add encryption at rest. Protect the host and its filesystem.from_agent is sender-selected. Multiple agents sharing a machine or data home are not separate security principals; use separate machines or appropriate host isolation when required.For Codex:
codex plugin marketplace upgrade yobiru
codex plugin add yobiru@yobiru
Start a new conversation after an update. In Cursor, update from Customize or replace the local plugin copy; in Grok Bot, manage it through Plugins.
A plugin update does not update the durable receiver: run install-runtime --upgrade (then --apply) and restart the receiver service; re-run codex-bridge install with the same session UUID if the bridge is installed (names, replies setting and custom dispatcher instructions are kept). Then coordinate your other machines:
sh "$Y" update check                     # official releases only; --channel preview includes prereleases
sh "$Y" update status                    # installed plugin, durable runtime, running receiver, notices
sh "$Y" update notify --channel preview  # dry run; add --apply after review
notify sends a versioned notice only after this machine's plugin, runtime and running receiver run a published official release, and only to known installations (discovered receivers, --peer, installations remembered with agents --remember, earlier pending notices). Each machine and agent has a durable state: notified (202 with a receipt for the message id; not proof of an upgrade), verified (later discovery shows that version running; software only), pending (offline, retried on the next run), blocked (403; asked again only when that receiver's /info shows access again, or with --retry-blocked), rejected, or uncertain (never resent automatically; --reconcile-uncertain resends the identical message id). Notices request wake: now; each receiver's wake policy still decides. A received notice is information for the agent and its owner, not a command. Opt-in reminders: update reminder-template systemd-user|launchd|cron prints a weekly update check --record job.
For offline installations, first authorize a notice with update notify --peer HOST/AGENT --apply; it stays pending until that receiver becomes reachable. update maintain --apply records an update check an
→ →
→ →
→ →
→ →
→ →
→ →
→ →
→